


Bookpage Karte - bookpage card
Samstag, 13. Mai 2017
Hallo ihr Lieben!
***
Hi all!
Habt ihr Lust mal wieder eine neue Colorationstechnik zu versuchen? Heute habe ich (Bianca) zusammen mit unserem Designteam diese Anleitung für die Bookpage-Technik vorbereitet. Es existieren viele verschiedene Anleitungen zu diesem Thema im www. Diese hier ist die einfachste Variante und sie ist genau richtig, wenn ihr diese Technik noch nie probiert habt.
***
Are you in mood for trying a new coloration technique? Today the design team and I (Bianca) have preapared this little tutorial to show you how to do the bookpage-technique. There are so many tutorials for bookpage-technique in the www. This one is the most easy one, ideal if you never have try to color in boogpage technique before.

* alte Buchseiten (dazu später noch ein bisschen mehr!)
* Buntstifte, mindestens 2 Farbnuancen pro verwendeter Farbe + ein Weiß
* eventuell einen Buntstift Blender (klappt aber auch ohne!)
* eventuell Distress Stempelkissen
* Papier, Designpapier + Deko nach Wahl
* Stempelkissen, Schere + Kleber
***
This is what you need:
* old bookpage (I will write a little more info about this later)
* coloring pencils, 2 different shades of each color you want to use minimum
* eventually a colorpencil blender (but it works without, too!)
* eventually Distress stamp pads
* papers, pattern papers, deco
* stamp pad, glue, scissors

Beginnen müssen wir natürlich beim Bestempeln der Buchseite. An dieser Stelle noch ein paar Tipps dazu.
* Wenn ihr keine alte Buchseite habt, könnt ihr auch Zeitungspapier verwenden. Dazu einfach das Zeitungspapier erst auf ein weißes Stückchen Fotokarton kleben und gut trocken lassen. Beim colorieren müsst ihr dann aber darauf achten, dass ihr das Zeitungspapier nicht überstrapaziert. Sonst entsteht ein Loch.
* Wenn ihr ein altes Buch habt, aber dieses nicht zerschneiden möchtet, tut es auch eine gute Farbkopie einer alten Buchseite, so lange ihr einen Laser-Drucker und keinen Tintenstrahl-Drucker verwendet.
* Achtet darauf was auf der Buchseite geschrieben steht die ihr verwenden möchtet! Aus Erfahrung kann ich euch sagen, dass alle Beschenkten bei mir bisher immer versucht haben zu lesen was da drauf steht! Ideal ist ein Motiv das zum Inhalt der Buchseite passt.
***
Of course we have to start with stamping our image. But first here are some useful hints.
* If you don't have an old bookpage you can use newspaper, too. You have to stick it on a sheet of paper before you can start. If you color on it you have to be very careful not to damage the paper.
* If you have an old book but you don´t want to cut it you can use a good colorcopy of it, too. Take care you copy with a laser printer as this ink will be fade resist if you color it.
* Take care about the text on your bookpage. In the past I noticed that every receiver of a bookpage technique project tried to read the text. It´s ideal if you find a fitting text for your image.
So, dann fangen wir mal an:
***
So let´s start:

Mit einem normalen Stempelkissen stempelt ihr euer Motiv auf die Buchseite drauf. Je nach dem welche Beschaffenheit euer Papier hat kann es sein, dass ihr dafür etwas mehr Stempelfarbe braucht als ihr es gewohnt seid. weil das Papier rauer ist.
***
Stamp your image with a normal stamp pad. Don´t forget it´s not stamping paper you are using. So maybe you will need a little more ink as usual.

Dann beginnt mit der Coloration. Es wird immer zuerst die helle der beiden Farben aufgetragen und dann mit der dunklen Schatten coloriert. Ich habe die beiden Farben dann noch mit einem Blender bearbeitet. Wenn ihr keinen Blender habt macht das aber auch nichts, ihr könnt statt dessen auch mit der helleren der beiden Farben die Übergänge zu den dunklen Teilen übermalen und so vermischen.
***
Start to color your image. You always have to use the light shade of your color first and than you can create shadows with the dark shade. You can blend the colors with a blender. If you don't have one you also use the light shade of your color again and color once more the areals between the light and the dark shade. It will look nearly the same as if you use a blender.

Mit weiß erzielt man schöne Kontraste. Wenn ihr möchtet könnt ihr auch Teile des Motivs ohne Coloration lassen. Jetzt sind wir schon fertig mit dem Colorieren des Motivs. Um es etwas hervor zu heben könnt ihr jetzt noch mit einem hellen Grau einen Schatten um das Motiv herum machen.
***
With a white color pencil you can create pretty accents in your image. If you like you can also leave parts of your image without coloration. If you have finished your coloration you can create a light grey shadow around it. That way it will turn out better.

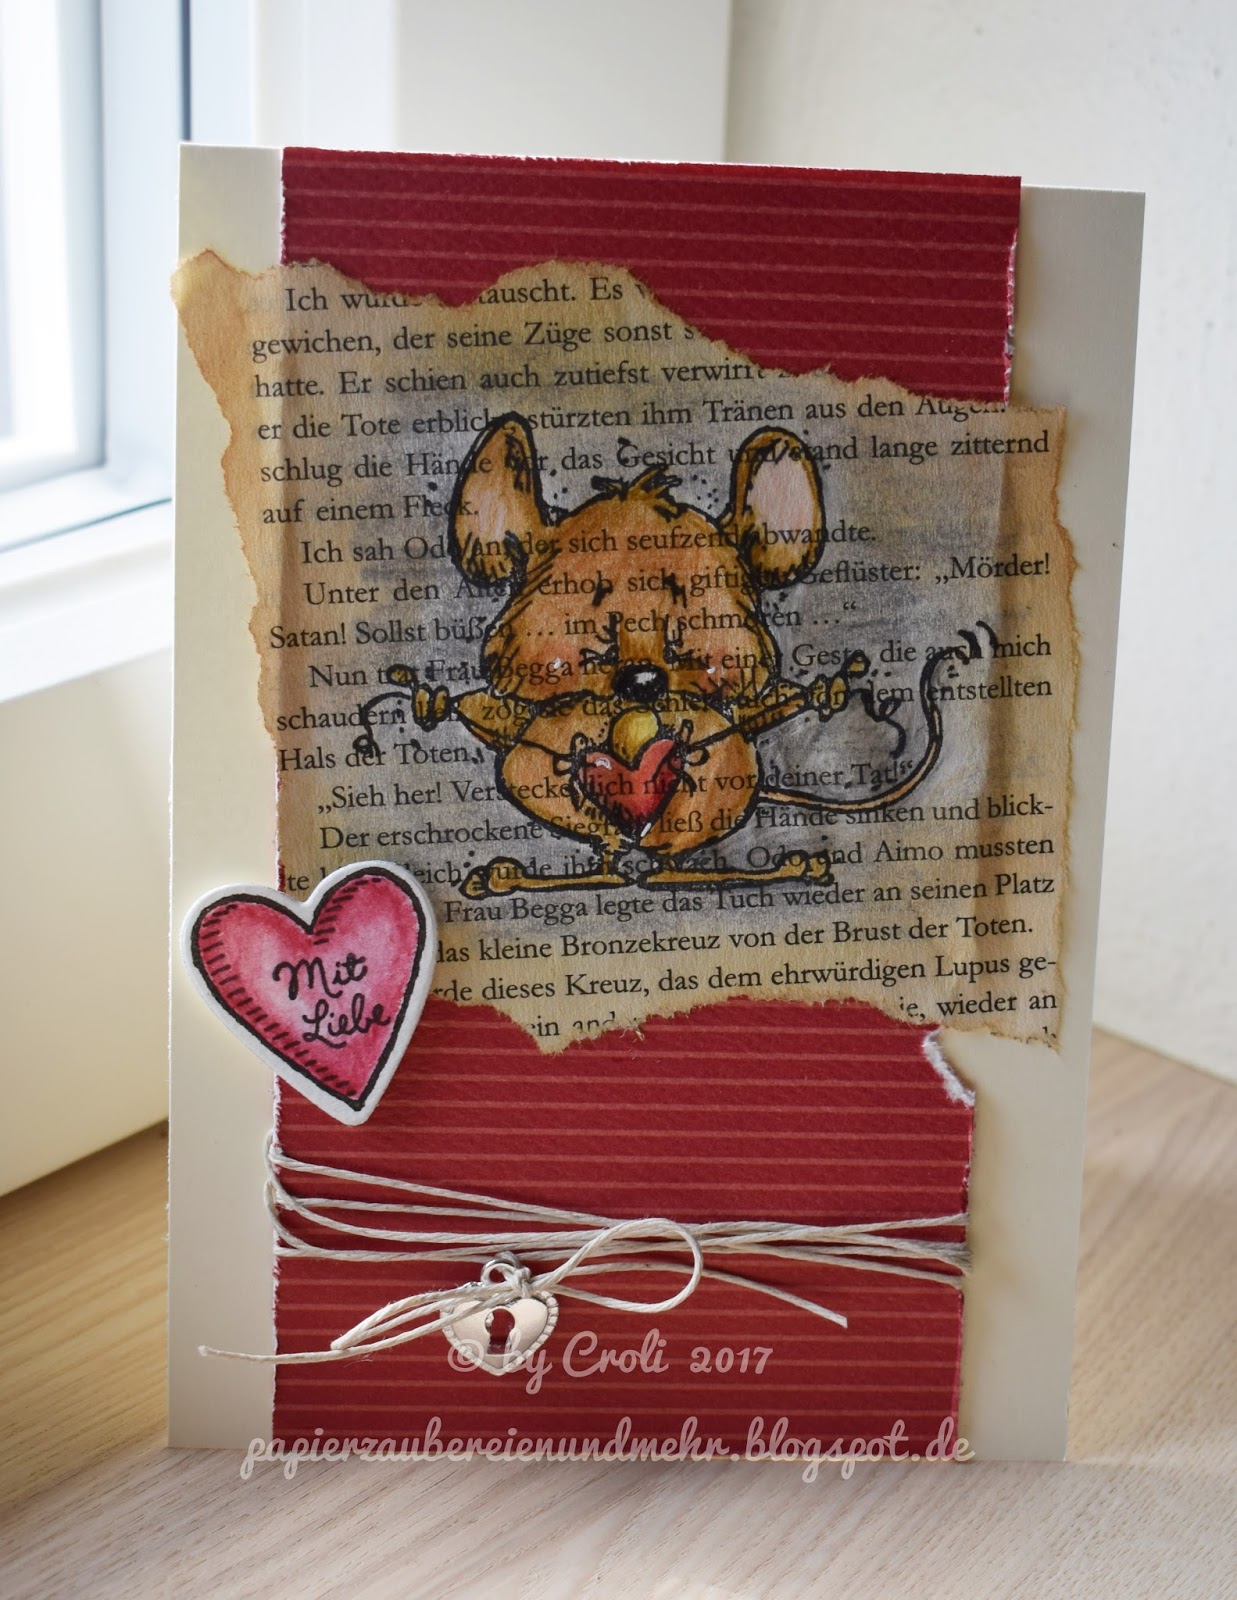
Am Schluss könnt ihr noch die Ränder des Motivs etwas mit der Distress Ink Farbe bearbeiten. Dass hebt euer Motiv noch etwas hervor und verstärkt den "altes Buch" Effekt noch zusätzlich. Jetzt kann das Motiv zum Einsatz kommen.
***
You can distress the edges of your creation with distress ink. It will push the "old book" look. Now you can use your image in bookpage technique.

Hier seht ihr noch die tollen Werke unserer Designer:
***
These are the projects of our team:


2 Kommentare:
Das ist eine tolle Idee... eure Karten schauen toll aus... vielen lieben Dank für eure Anleitung... gefällt mir Superhirne und werde ich ausprobieren:-))
LG Petsy
Supergut soll das heißen:-)) dieses Handy...
Kommentar veröffentlichen