


Eine Box zum Schütten - a box to poor out
Samstag, 22. Juni 2013
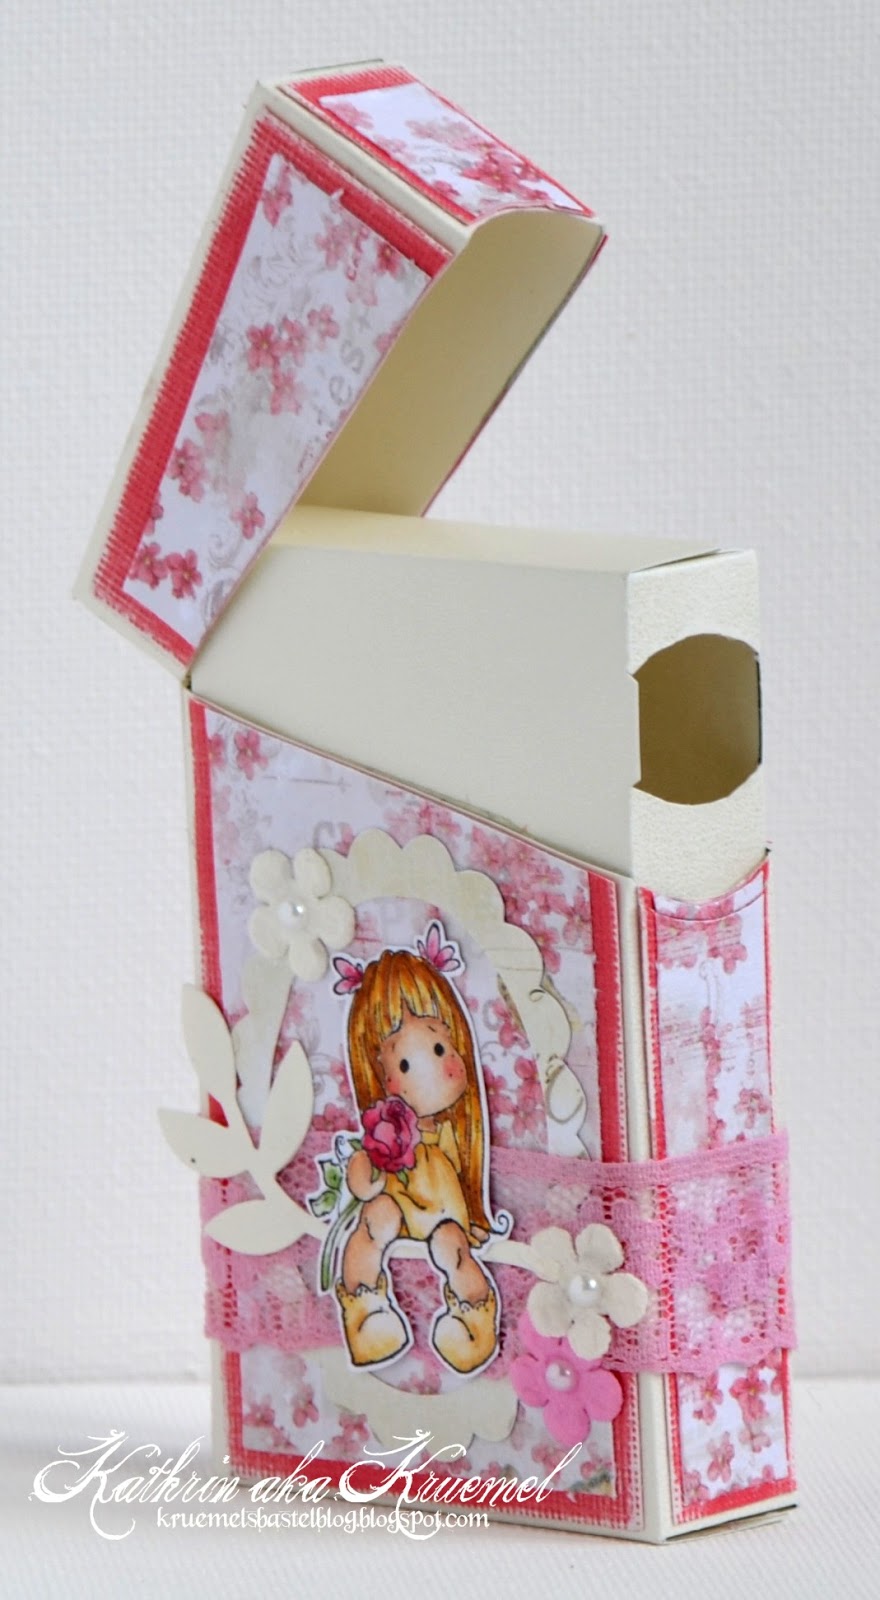
Hallo und herzlich Willkommen zu einer neuen Ausgabe des Stempeleinmaleins. In unserer heutigen Ausgabe haben wir eine kleine Schachtel für Euch. Sie hat einen Ausgießer und kann mit kleinen Süßigkeiten, z. B. Smarties, TicTac o. ä. gefüllt werden.
***
Hello and welcome to a new issue of Stempeleinmaleins. In this week's issue we have a tutorial for how to make a little box. It has an opening to poor the content out and can be filled with small candies like Smarties, TicTac or something similar.
Ihr braucht:
- 1 Bogen Cardstock, A4
- Vorlage
- Vorlage
- Falzbein
- Lineal
- Kleber
- Schere
- Dekoration
***
You'll need:
- 1 sheet of A4 cardstock
- template
- template
- bone folder
- ruler
- glue
- scissors
- decoration

HIER könnt Ihr Euch die Vorlage für die Box runterladen und anschließend ausdrucken. Übertragt Sie dann auf Euren Cardstock - es sollte ein fester Cardstock sein, da sonst die Falzung des Deckels ziemlich schnell "labbrig" wird - und schneidet die Form entlang der durchgezogenen Linien aus.
***
HERE you can download the template for the box and print it out. Copy it onto your Cardstock - it should be a thick cardstock or the fold on the lid will break after a while - and cut it out along the black lines.

Falzt dann entlang aller gestrichelter Linien und knickt die Falzungen vor. Ich habe bei meiner Box die Linien für Euch sichtbar gelassen, um Innen- und Außenseite auf den Fotos besser unterscheiden zu können. Ihr solltet die Linien nicht so dunkel machen - oder sie vor dem Zusammenbauen wegradieren - da sie sonst bei der späteren Box sichtbar sein werden.
***
Score your cardstock along all the broken lines and fold at the crease lines. On my box I left the scoring lines black to make it easier for you to see on the photos, which is the inside and which the outside of the box. You should either make them lighter or erase them before putting the box together or they will be seen on parts of the finished box.

Bringt, wie auf dem Foto an der rechten Seite zu sehen, an der Klebelasche auf der späteren Außenseite der Box einen Streifen Klebeband an.
***
Add a strip of sticky tape to flap, facing the outside of the box as can be seen on the photo.

Klebt nun den ersten Teil der Box zusammen. Dafür braucht Ihr sie nur aufzurollen, bis der Klebestreifen auf die Innenseite der Box trifft und sie dort fixieren.
***
Glue together the first part of the box. You only need to roll it until the flap/glue meets the inside of the box and fix it there.

Bringt dann weitere Klebestreifen am letzten Streifen der Box an.
***
Then add more tape to the last section of the box.
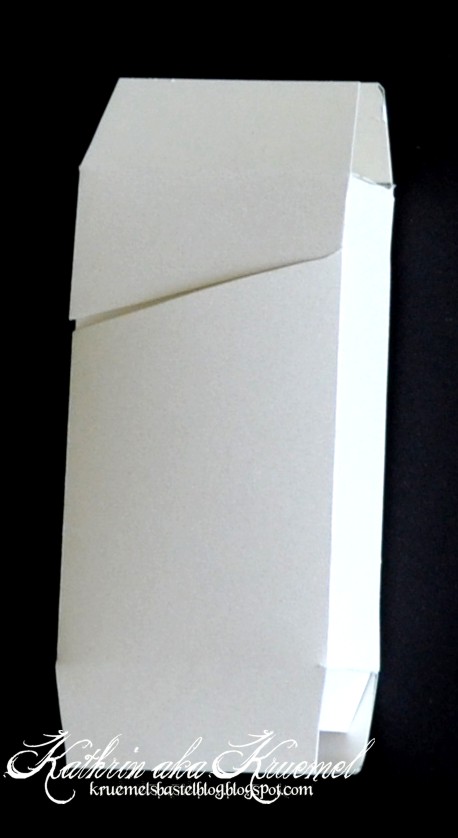
Rollt die Box dann wieder auf und verschließt sie mit den Klebestreifen. Wichtig ist, dass Ihr unbedingt den kleinen Streifen des Deckels mit einfaßt!
***
Roll the box up again and close it with the tape. Take care to also fix down the small part of the lid!
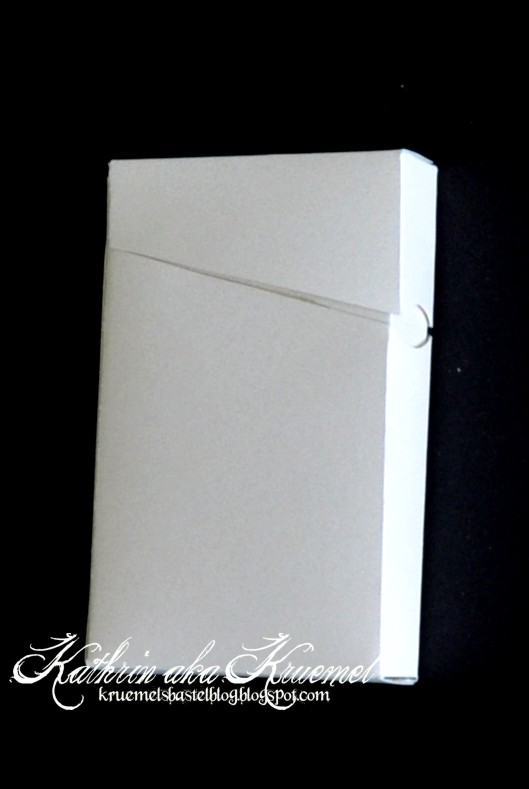
Nun müsst Ihr nur noch den Boden schließen, die Box füllen und dann auch den Deckel oben verschließen.
***
Now you only need to close the bottom, fill the box and then also close the top of the lid.

Und dann geht es ans Dekorieren. Um den Cardstock und das Designpapier passend auf die Vorderseite und den Deckel der Box aufzubringen, habe ich ihn zuerst nur am Deckel fixiert, enlang der schrägen Kante des Deckels mit der Schere geschnitten und den Rest des Cardstock passend auf den unteren Teil der Box geklebt.
***
And then it's time to decorate! To make the cardstock and designer's paper match the lid I only glued it down to the lid first, used my scissors to cut along the edge of the lid and then glued down the remaining part to the bottom of the front.

An der Schmalseite habe ich einen kleinen Text angebracht.
***
To the side part I added a little text.
Und so sieht die Box geöffnet aus. Der Inhalt kann durch die Öffnung an der vorderen Schmalseite entnommen/ausgeschüttet werden.
***
And this is what the box looks open. The candies can be poored out from the opening at the side.
Ich hoffe, Ihr findet die Box genauso süß wie ich und wünsche Euch viel Spaß beim Nachbasteln!
***
I hope you like this box as much as I do and hope you have fun making your own!
Und hier sind noch die Boxen vom Team:
***
An these are the boxes from the team:
An these are the boxes from the team:


8 Kommentare:
Beautiful box!
Thanks for sharing!
tolle idee werd ich auf jeden fall ausprobieren....
liebe grüsse
Thank you so much for this tutorial.
It's a beautiful box
Kind Regards
Anita
Hallo,
wouw! Die ist Klasse und ich friemel mir hier gerade eine zusammen. Klasse und vielen Dank für die Anleitung mit Vorlage.
Viele Bastelgrüße
Bille
Super Box... aber könntest du bitte noch die genauen Maße aller teile angeben bitte????
Vielen lieben Dank
Hallo,
die Box ist wirklich super genial :-) danke für die tolle Anleitung, muss ich auf jeden Fall ausprobieren!
Viele Grüße, Renate
Fiz o meu com o Step by Step my Blog
http://happyscrapp.blogspot.com.br/2013/06/fiz-essa-caixinha-de-tic-tac-de-papel.html
Hallo,
Ich habe auch die Box nach deiner Anleitung gemacht. Es waren allerdings 2 Versuche nötig, da die genauen Maße leider fehlen. Es würde sehr helfen, wenn du die noch nachliefern könntest.
Kommentar veröffentlichen