


Colorieren mit Tombows
Samstag, 14. August 2010
 Es ist Samstag und ihr wisst was das heißt?! Genau! Es gibt eine neue Ausgabe vom Stempeleinmaleins! Diese Woche werden wir von der superkreativen Alma unterstützt. Sie ist so lieb und zeigt uns heute wie man mit Tombows coloriert.
***
It's Saturday again and you know what this means?! You are right! There is a new issue of Stempeleinmaleins! This week we have a guest again, it's the supercreative Alma. She is so nice and shows us how to color with Tombows today.

Ich stemple mein Motiv zunächst auf das Aquarellpapier „Montval“ – 200g von Canson. Nur auf diesem Papier funktioniert die Coloration richtig. Ich nehme meistens das Onyx Black Stempelkissen von Versafine. Ich habe nun von einigen gehört, dass es bei ihnen nicht 100% wasserfest ist, ich hatte damit aber noch nie Probleme.
***
I'm stamping my images on watercolour paper by "Montval" – 200 g of Canson. Tombows are just working on this paper very easy. Most of the time I use the Versafine " Onyx Black" ink pad. Last time I have heard of some people that this ink pad isn't water resistent in all cases, but I haven't any problems with it until today.
 Zuallerst fange ich immer mit dem Gesicht an. Dafür ziehe ich die Konturen mit der Farbe „Coral“ (Nr. 873) nach.
***
I always start with the face and colour the outlines of the face with the colour "Coral" (No. 873).

 Nun nehme ich einen Pinsel (Nr. 1-3) und vermale die Linien mit Wasser. Wenn der Pinsel zu nass ist, tupfe ich ihn an einem Papiertaschentuch ab. Ich coloriere das Gesicht in kreisenden Bewegungen nach innen. Ist die Mitte des Gesichtes daraufhin noch zu dunkel, reinige ich den Pinsel erneut und vermale die Farbe in der Mitte erneut.
***
Now I use a brush (No.1-3) and blend the lines with water. If the brush is too wet, I dip it on a tissue. I colour in circular movements to the inside of the face. If the middle of the face is too dark, I clean the brush again and colour over the middle with the clean brush again.
 Nun verwende ich den Tombow Nr. 992 („Sand“), male ihn auf eine Untertasse und nehme die Farbe mit einem Pinsel auf. Ich ziehe die Konturen mit der Farbe „Sand“ nun mit dem Pinsel erneut nach, reinige den Pinsel und vermale die Farbe wieder Richtung Gesichtsinneres. Wenn ihr wollt, könnt ihr versuchen, die Farbe direkt mit dem Stift aufzutragen, aber ich finde, dass das sehr gefährlich ist, da die Farbe „Sand“ je nachdem doch sehr dunkel ausfällt wenn man sie direkt im Gesicht aufträgt. Mit dem Pinsel hat man es ein wenig besser unter Kontrolle und es ist zarter.
***
Now I use Tombow No. 992 ("Sand"), add the color onto a saucer and take the colour with the brush. I add "Sand" with the brush on the outlines of the face. So I get some shadows into the face. After that I blend the lines in circular movements again with the clean brush to the inside of the face. If you want, you can try to colour directly with the pen onto the face, but I think, it's too dangerous, sometimes the colour "Sand" is too dark, if you put it directly to the face. With the brush you can control the colour a little bit better and the colour looks softer.
 Für Tildas Kleid habe ich mich für die Farbe „Purble Sage“ (Nr. 623) entschieden. Wieder ziehe ich die Konturen des Kleides nach und vermale die Farbe in Richtung Kleidinneres mit einem sauberen Pinsel.
For Tilda's clothes I decided to use the colour "purple sage" (No. 623). Again I colour the outlines with the pen and blend with the water brush in circular movements to the inside of Tilda's clothes.
 Nachdem ich die Farbe vermalt habe, sieht es dann so aus.
***
After blending with water, the image looks like this.
 Da mir der Schatten für Tildas Kleid noch nicht tief genug ist, male ich nun direkt mit der gleichen Farbe des Stiftes nochmals die Konturen nach.
***
Because I think the shadow of Tilda's dress isn't deep enough, I colour directly with the same pen around the outlines again.
 Wieder vermale ich die Farbe mit einem sauberen Pinseln kreisenden in Bewegungen. So sieht das Ergebnis aus.
***
Again I blend the colour in circular movements with a clean brush to the inside of the dress. Here you can see the result.
 Danach zeichne ich an den Ärmeln die Konturen mit Stift Nr. 992 („Sand“) nach.
***
Now I colour the lines of the sleeves with pen No 992 ("Sand") .
 Wieder vermale ich die Farbe der Ärmel mit einem Wasserpinsel. Daraufhin ziehe ich die Konturen von Tildas Haar mit „saddle brown“ (Nr. 977) nach und vermale sie ebenfalls.
***
Again I blend the colour of the sleeves with water. After that I colour the lines of Tilda's hair with "saddle brown" (No.977) and blend with water.
 Beim Vermalen ist mir ein wenig zuviel Wasser auf das Ende von Tildas Zöpfen getropft, deshalb coloriere ich zunächst die Hände, bis das Papier wieder trocken ist. Wichtig, wartet immer mit einem zweiten Farbauftrag, bis das Papier nicht mehr ganz nass ist, denn sonst kann es sein, dass die Farbe sich nicht mehr gut vermalen lässt. Bei den Händen habe ich die gleiche Vorgehensweise und nutze die gleichen Farben wie beim Gesicht („Coral“ und „Sand“).
***
While blending I have used a little bit too much water which has run to the top of Tilda's braids. So I colour Tilda's hands first and wait until the paper has dried. It's very important to wait with adding more colour until the paper isn't too wet anymore. If you don't wait, it's possible that you can't blend the colour easy later. For colouring the hands I use the same colours like when I coloured the face ("coral" and "sand").
 Jetzt ist das Tildas Haar trocken genug und ich kann die Zopfenden colorieren und eine zweite Kontur mit der gleichen Farbe wie vorhin („Saddle Brown“) nachzeichnen. Diese Kontur vermale ich ebenfalls mit Wasser. Tildas Rock coloriere ich ebenfalls mit „Sand“.
Now is Tilda's hair is dry enough and I can colour the top of the braids and add a second outline with the same colour like I've used before ("saddle brown"). I blend the outline with water again. Now I colour Tilda's skirt with "sand" too.

***
I follow this scheme by colouring tildas socks and shoes. First I paint the outline with the pen and then I blend with water in circular movements. You can see on the picture, that I have coloured the outlines on Tilda's shoes a second time, because I want to get a deeper shadow.
 Nach dem Vermalen mit Wasser von Tildas Schuhen coloriere ich Tildas Knie mit „Coral“ und „Sand“. Den Löffel coloriere ich mit Nr. N.65 „cool grey“.
***
After blending Tildas shoes, I colour her knees with "coral" and "sand" and the spoon with No. N65 "cool grey".
 Den Muffin coloriere ich mit Nr. 772 („Blush“) und Nr. 969 („Chocolate“), sowie No. 243 („mint“) und vermale danach mit dem Wasserpinsel.
The cupcake I coloured with No 772 ("Blush") and No.969 ("Chocolate"), No. 243 ("mint"). After colouring with the pen, I blend the colours with the water-brush.

***
Now I color the wings with a soft light blue (No. 451 "Sky Blue").
 Nach Vermalen der Flügel mit Wasser, warte ich nun, die Deko des Muffins zu colorieren, da es schwierig ist dieses kleine Detail zu colorieren, wenn das Papier nass ist. So verläuft die Farbe sehr schnell, was besonders bei einer kleinen Fläche schnell passieren kann. Wartet also bitte, bis das Papier trocken ist. Somit zeichne ich zunächst den Schatten um Tilda herum mit einem hellgrauen Tombow (Nr. N 75 („cool grey“).
***
Afert blending the wings I wait to colour the decoration of the muffin, because the small detail s are hard to colour, if the paper is too wet. That's a problem when colouring such small areas (the colour blends very fast over the outlines). Please wait until the paper is dry. So I colour add a shaddow around Tilda with a grey Tombow Nr. N 75 ("cool grey") first.

 Ich vermale die Farbe mit Wasser und setze noch einen dunkleren Schatten (Nr. N 55„cool grey“) an Tildas Füße, den ich ebenfalls mit Wasser vermale.
***
I blend the shadow and put a darker shadow (No. N 55 "cool grey") under Tilda's feet and blend it with water again.
 Nun setze ich die finalen Akzente: Ich coloriere die Dekoration des Muffins (Nr. 158 „Dark Olive“, Nr. 847 „Crimson“) und zeichne, wie Jay Jay es in ihrem Tutorial gezeigt hat, die Wangen mit Pastellkreide und setze Akzente mit dem weißen Gelstift.
***
Now I set final accents. I colour the decoration of the muffin with (No. 158 "dark olive"and No 847 "crimson") and paint, like Jay Jay has shown it in her tutorial, the cheeks with pastell chalks and set accents with the white fineliner.
 Nun muss ich das Motiv nur noch verbasteln und auf eine Karte setzen.
***
Now I just have to create something with the image and put it on a card.

Und hier noch einige Karten vom Team:
***
And here are some cards from the team:
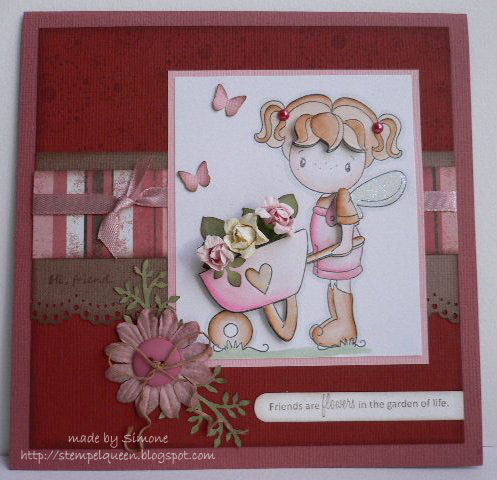
Moni


Simone


Jay Jay
***
And here are some cards from the team:
Moni


Simone


Jay Jay

4 Kommentare:
Super, vielen Dank für die tolle Anleitung liebe Alma.
Liebe Grüße von Litta
eine super Anleitung, vielen Dank.
Liebe Grüße!
Fimola
Huhuu, das ist genau wonach ich gesucht habe, denn bisher hatte ich immer etwas Schwierigkeiten mit den Tombows. Vielen Dank für das informative Tutorial!!! Zufall?!?!? Genau heute hab ich nämlich auf meinem Blog einen Colorationsvergleich gemacht und mir die Frage gestellt, wie genau ich am besten die Tombows verwende!!!
LG, Kicky
A fantastic tutorial, love the fact you used Tombows as this is the first time I have seen anyone using them.
Di.
Kommentar veröffentlichen